No code editors
Not everyone likes to edit their pages using html, there are a lot of occasions when you want that a user without html knowledge needs to modify a web page, here I describe the approach that I use in the projects that needs to edit a html snip
For a No code user to exist there most be a code user somewhere, here are the steps that I follow to capture content and create a snip template:
- Define the values to capture in a form editor
- The html code of the template that will use the captured values.
- Capture the values
The steps 1 and 2 are performed by a code user, the last step could be performed by a no code user.
The first step is a way to define the values that will be captured by the editor of the content, we do this with a form editor.
Here is a live example of the form editor, you can view a live demo to edit this form and its values here,
Create the capture forms is an easy and fast process, I created the form for this Blog's Navbar example in less than one minute
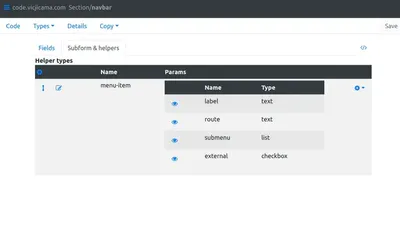 Form editor for the Navbar values
The next step is to define the html code, we will use the values captured on the previous step here.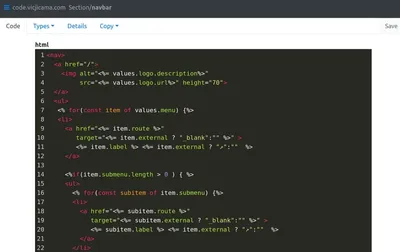
Navbar code for this blog
The last step is to capture the data, this is the view of the UI for the editor user, this way the editor only have to worry about fill the right content.
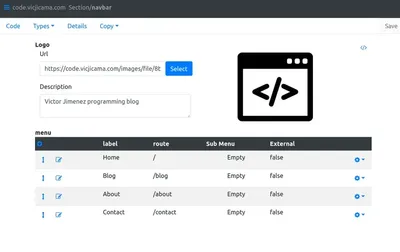 UI for the content editors
This way you could have a designer role that is dedicated to create html template with its forms and another editor role to modify and capture the required information.
No matter which is your role you will always see the preview automatically update with the html or values changes.
Here is a live demo of the editor in action, you can edit and download the pages here.
You can see the live result of this code and values on the menu for this blog or with other values in other examples like the MVP blog templates
You can create pages or page elements using this html+form+values method, the other method is to create a route pack and upload your html code directly as described on this post